 English
  Русский
Heated rear window not working: how to find a broken line and repair it
Updated:
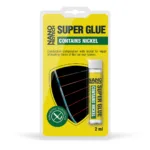
If the whole heated rear window is not working, check the fuse, relay and switch first. If only some strips stay cold, a heating line is most likely broken: a break of up to 2 cm can be repaired without a soldering iron using nickel-filled NANOPROTECH Conductive glue. The glue goes on through a stencil in two coats, and the heating can be switched on no earlier than 2 hours after the repair.
What you need
Why the rear window does not heat
- The whole window stays cold. The fault is most likely in the power circuit — the fuse, relay or switch; conductive glue will not help.
- One or more strips stay cold. A heating line — a thin conductive track on the glass — is broken, usually by an ice scraper or a load rubbing against the glass from inside.
- A side bus bar or contact is damaged. Bus bars run along the edges of the glass and feed voltage to the lines; the wire contacts are soldered to them. They are repaired by a specialist, not with the glue.
How to repair a rear window heating line — step by step
- Find the break. Switch the heating on with the glass misted up: the broken line stays as a strip that does not clear. Switch the heating off and inspect that line in good light — the break shows as a thin gap or scratch. Make sure it is no longer than 2 cm.
- Prepare the conditions. Work at about +25 °C, and not below +10 °C: at lower temperatures the chemical reaction slows down. In winter, put the car somewhere warm and let the glass warm up and dry. Clean the glass around the break, degrease it with alcohol and let it dry.
- Shake the bottle. Shake it thoroughly until uniform: the conductive nickel filler makes up to 60% of the compound.
- Fit the stencil. Peel the self-adhesive part of the stencil off its backing and stick it to the glass with the break in the middle of the slot.
- Apply two thin coats. Straight after mixing, brush the first coat through the stencil and the second a minute later, shaking the bottle before each coat. A thick coat runs down the glass and takes longer to dry.
- Remove the stencil. Carefully peel it off once the line has dried, after about 15–20 minutes.
- Wait 2 hours. Do not switch the heating on earlier: the uncured compound would overheat and the line would burn out at the repair.
One 2 ml bottle repairs up to 20 cm of line in total — enough for several breaks on one window. The same glue also restores circuit board tracks and contacts: see how to fix remote control buttons.
Why it may not work
- The bottle was not shaken. The nickel filler settles, and without mixing the line does not conduct. Shake the bottle until uniform before use and before each coat.
- The glass was not cleaned and degreased. The compound does not hold well on dirty, greasy glass. Remove the stencil only once the line has dried.
- The damage is not suitable, or it was too cold. The glue is designed for line breaks of up to 2 cm, not for bus bars or contacts, and needs +10 °C or above.
Safety precautions
- Repair the line only with the heating off. If, once switched on, the repaired spot sparks or gets noticeably hotter than the rest of the line, switch the heating off at once, remove the compound and repeat the repair.
- The compound is flammable: work away from open flames and heaters, and with the car doors open.
- Avoid contact with eyes; if it happens, rinse them with running water. Wash your hands with soap and water after work. Keep the bottle out of the reach of children.
Frequently asked questions
Why is my heated rear window not working?
Either the power circuit or broken lines. If the whole window stays cold, check the fuse, relay and switch; if only some strips do, a line is most likely broken.
How do I find a break in a heating line?
Use a misted-up window: switch the heating on, and the strip that does not clear is the broken line. Inspect it in good light with the heating off. If the gap cannot be seen, find it with a multimeter.
Can a heating line be repaired without soldering?
Yes. Nickel-filled conductive glue restores the conductivity of the line without a soldering iron if the break is no longer than 2 cm.
How soon can I switch the heating on after the repair?
After at least 2 hours. The stencil comes off after 15–20 minutes, but switching on earlier overheats the uncured compound and burns the line out at the repair.
What if a heater contact has come off?
Take the car to a specialist. The full heater current flows through the contact, which is soldered to the side bus bar: conductive glue will not hold the wire and will overheat.
More solutions
- How to use epoxy putty (cold weld): preparation, mixing, application, storage
- Blue vs red threadlocker: how to choose, apply and undo it
- How to fix a leaking pipe with epoxy putty: metal pipes, taps and radiators
- How to fix a fuel tank or radiator leak: a temporary repair with epoxy putty
- How to glue glass: clear UV glue, light and step-by-step instructions
- How to fix remote control buttons: restoring contacts with conductive glue
Still have questions?
Describe your task and a NANOPROTECH technical specialist will suggest the right product and how to use it.